
After spending lots of time with other things, such as re-purposing an old Eee PC for use with the printrbot, I finally sat down with the build again.
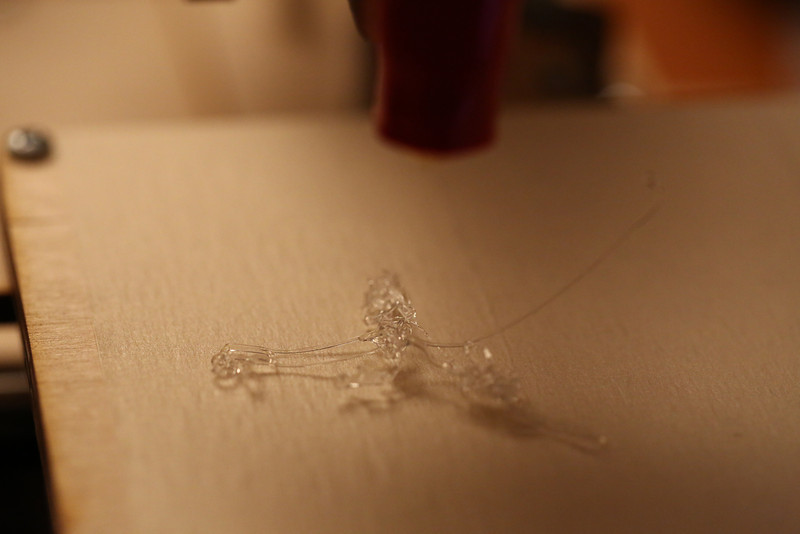
Left to do was testing the Eee, getting the printrboard mounted and the cabling worked out as well as some initial calibration work. First of all I had another look at the Y axis, the belt really did need tightening. Just tightening it by hand again and adding a new zip tie felt like a bad idea since getting the zip tie off to tighten it every time isn’t fun, I really don’t want to damage the belt. Without anything printed to use and nothing else that could be reused in a sane way I once more turned to using filament pieces and it worked out quite well actually!
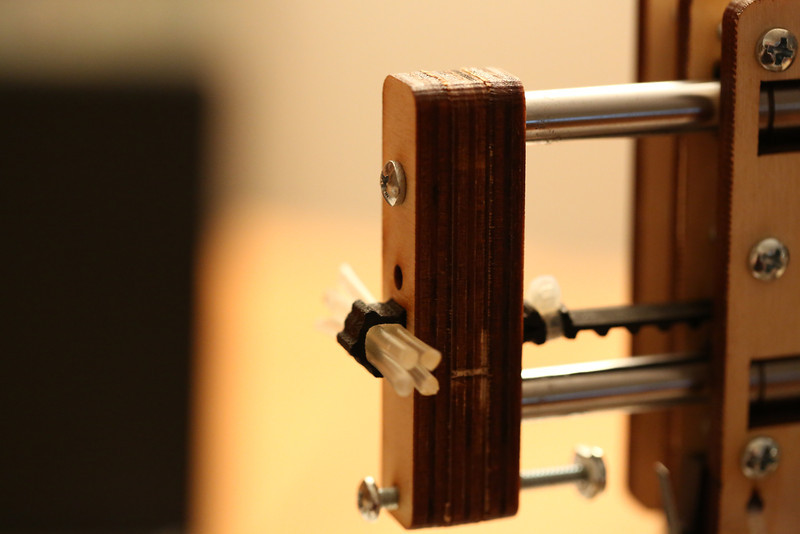
Quick and dirty filament belt tensioner.
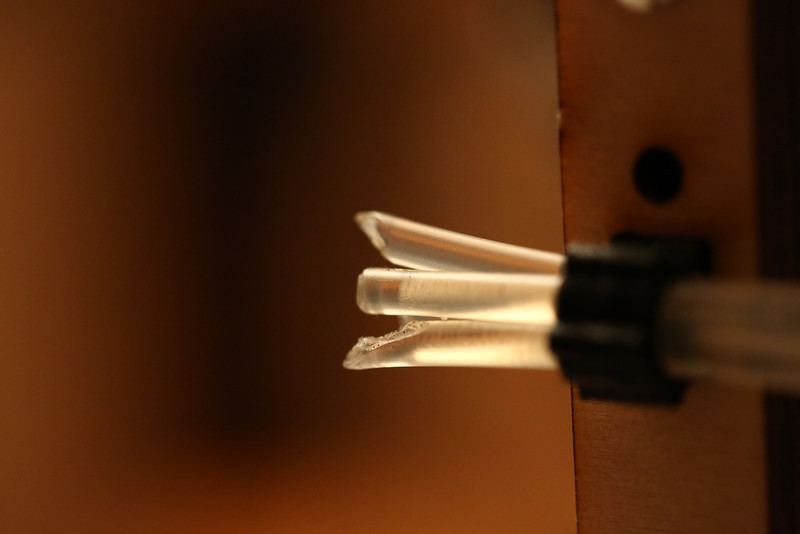
Closeup of the sharpened filament ends
I’m a bit worried though since I seem to have an issue with the top Y rod being slightly longer than the other. The loose fit of the top rod in the front extrusion mount and the belt mostly pulling on the bottom part the makes the extruder tilt slightly forwards. The loose fit is my fault, it was extremely tight at first so I couldn’t get the rod in, I then sanded too much probably. Solutions such as trying to grind one rod slightly, switching rods with the the longer one at the bottom instead and possibly using epoxy to make sure they aren’t so loose are solutions I’ve contemplated. But I’m leaving it for now to see how bad it is when printing.
Then I finished the zip tying of the cables, hooked them up again to verify everything worked with the Eee (and it did, running Fedora Core 18 with pronterface) and then started to try getting the board into the base. Had to re-route some cables and redo some zip ties but finally I got it in place. And it still worked, was a bit worried. ![]() Heat dissipation really won’t be good in that small unventilated space but given how small it is it’s not easy to do something about. Also not sure how hot it gets during printing.
Heat dissipation really won’t be good in that small unventilated space but given how small it is it’s not easy to do something about. Also not sure how hot it gets during printing.
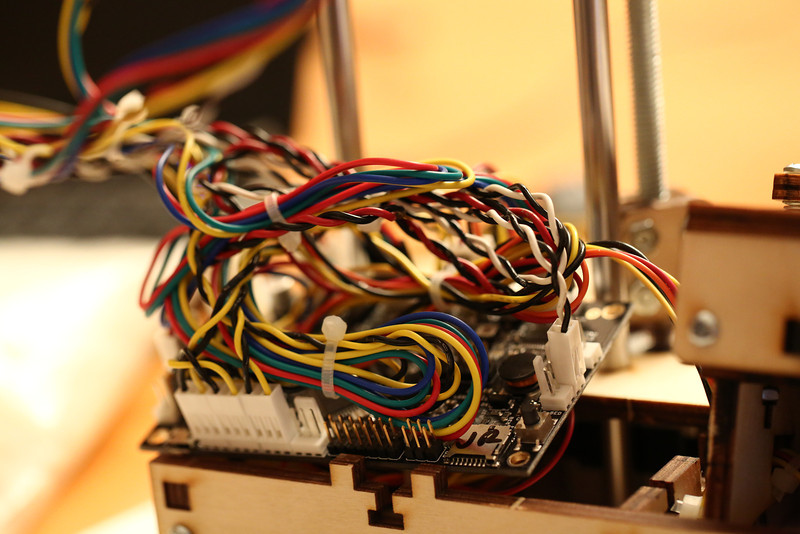
Printrboard going in.
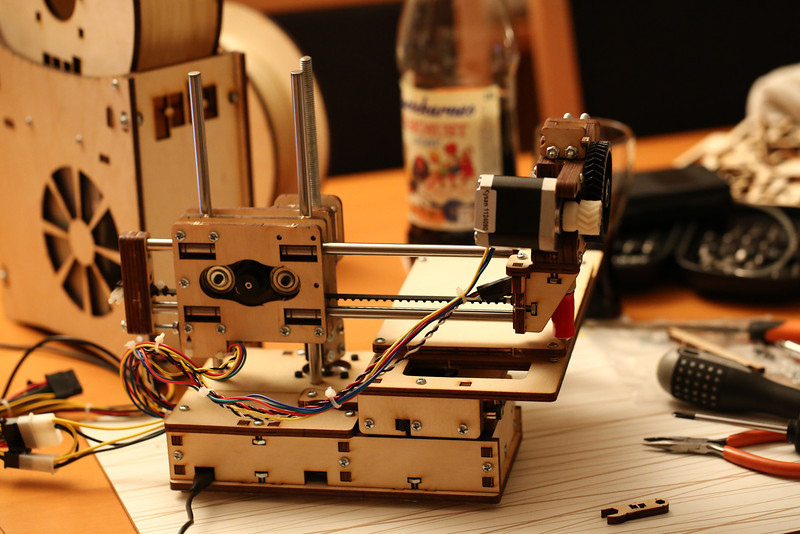
Printrbot fully assembled!
Continued with lubricating the Z rod, used a liquid lubricant with PTFE, which seems to a favored method. Have some weird resonance noise during Z movement now, helps if I tap the rod. Perhaps it has slid down and is barely touching the motor shaft? Not a big problem. The wobble is under control at least.
Then I mostly followed the getting started guide and did max X and Y measurements, result was 136×120 mm but I could probably squeeze in another millimeter or two with some adjustments. Or mod the bed to stick out longer in the front, there’s lots of unused Y reach that’s not being used now. I covered the bed in masking tape, haven’t found a local source of 3M blue tape yet, the best wide masking tape I could find was yellow Tesa tape which claims it can stay on for 8 days without leaving residue. With the tape on I could perform the bed leveling, using a piece of paper. It’s not perfect, but hopefully good enough?
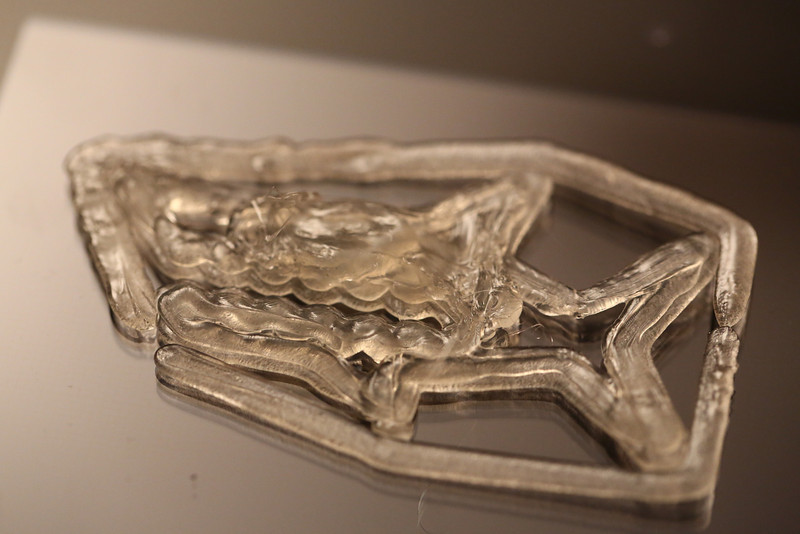
Continued on with feeding filament into the extruder, had to adjust the idler pressure, it was too high it seemed like, very hard to get the filament in. Then I heated up the hot end in Pronterface and extruded some plastic. Took quite a few careful extrusions of 5 mm at a time before I got a result, was a bit nervous for a while after hearing horror stories before of melted plastic filling up the extruder and making mess. But it went fine, clear strings of PLA were squeezed out of the nozzle! Time to calibrate E, which was pretty easy.
Extruded PLA when loading the filament and calibrating the E value.
Since skeinforge is nicely packaged in Fedora Core 18 I thought it would be nice to have a go at using it instead Slic3r. So I did a rough configuration of skeinforge, had to google a lot. I know now a lot of gcode compared to before… When I thought it was fairly OK I went ahead to try to print my test subject, the Mini Mr Jaws. It did not work out very well… I thought things looked quite weird when the skirt was printed and then the craziness just continued, way too much PLA was being extruded so I aborted the print. It does look fairly promising though, if I can get the extrusion right. It seems to stick very well onto the tape.
Fail aka my first blob.
By that time it was after midnight so I gave up for the day since the print takes a pretty long time (pronterface guessed 51 minutes). The next day I went to get some tools that can be useful. The IR thermometer was a lot of fun, I’ve already used it a bit in the kitchen, on members of the family, bath water etc.
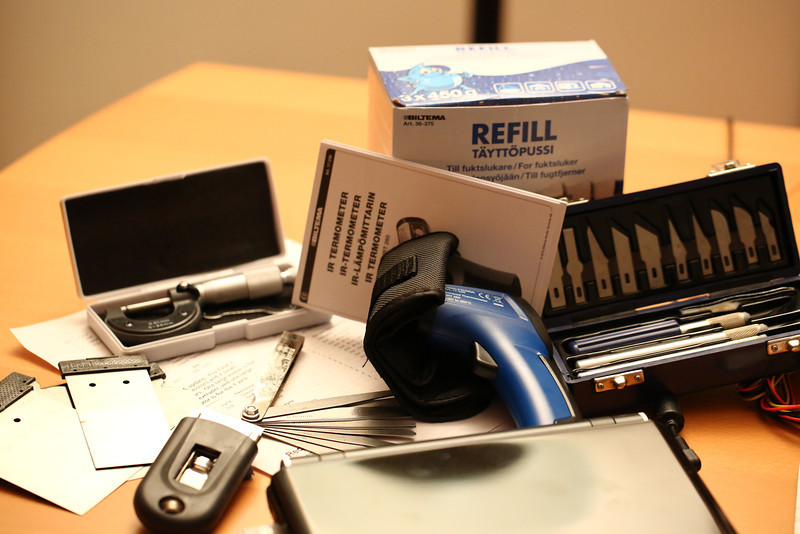
Bought some more tools; micrometer, feeler gauges, spatulas, wide razor blade, IR thermometer, hobby knife set and moisture absorbers.
I had another go at the skeinforge settings but have given up for now and instead packaging up the latest version of Slic3r on my main Linux box to use it instead. Hope to have a new post up with a successful print soon!
Links to the other parts of the build: part 1, part 2 and part 3