I’ve been playing around with some flash based lighting for quite a while now, but as I rarely have access to larger studio flashes I’m going the Strobist route. I have had a Sigma EF-500 Super for some time now and have recently purchased a few Westcott umbrellas and two Manfrotto 001B light stands. I need another flash as well, probably a Sigma EF-530 Super, but I’m still considering my options.
Meanwhile I want to start experimenting some more. Two things that I really wanted to try was the effect of putting a gel on the flash and other ways to restrict the light apart from snooting. I bought both a color correcting and an effects gel pack from flashgels.co.uk. And a really effective way to restrict and control the output from a flash is to use a snoot or a snoot grid. The inspiration for this small DIY project comes from the Strobist blog and the post DIY: Black Straws Snoot Grid (Part 1) from the lighting mods blog.
It doesn’t matter very much if the pieces of straw aren’t the exact same, but it’s extremly tedious work. After testing a few other items I found a tea candle holder that helped me quickly cut the straws into 20 mm pieces and then after some thinking I grabbed a toilet paper roll from my recycling bin and cut it to assist with the 50 mm pieces. The glue I used is a pretty convenient gel glue that doesn’t make a mess compared to traditional glues that tend to get thin threads of glue all over the place. While waiting for the glue to dry I also took the opportunity to use some leftover cardboard to make a new normal snoot. I used the pieces for the grids as a template, glued the ends and then covered it with black duct tape. At one of the ends I put small velcro dots (that came with the flash gels) which prevents the snoot from falling off the flash. I could have made a tighter version instead but this worked out pretty good actually. You can also fold it flat for storage and transportation.
The grids finally got finished and I wrapped them in black tape. I took a few crappy pictures with my Canon 860IS during the project:


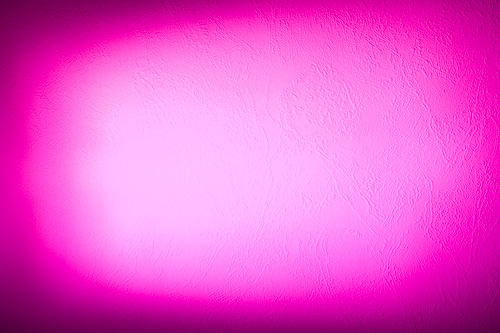
And here’s a few test pictures taken with the Sigma flash off camera triggered by my cheap ebay radio trigger and using my Canon 350D with a EF 17-40L. The camera was kept in approximately the same place and with the exact same exposure setting to better show the differences; ie the more you control the light the more light you lose. I put a colored gel on the flash to make it easier to see the pattern of the light on the wall:
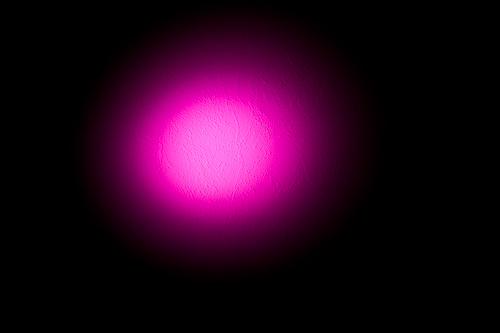
50mm snoot grid
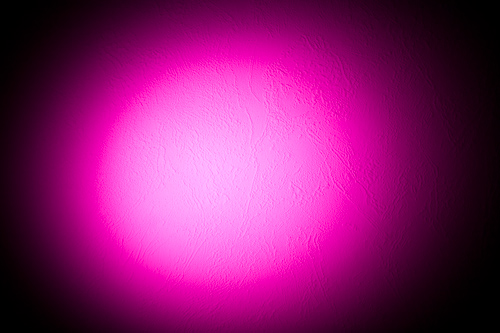
20mm snoot grid

normal snoot
no snoot
I then found a highly cooperative model to check the effect of the snoots on something other than a wall. Same camera and lens, still in approximately the same distance from the object and all with the same exposure setting. The amount of control is amazing!
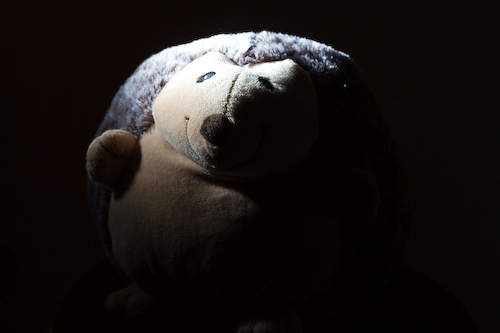
50mm snoot grid, no spill on the background at all!
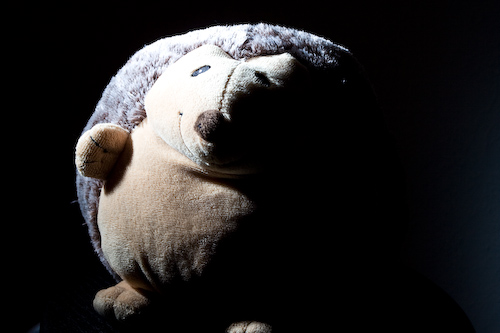
20mm snoot grid, some very minor spill
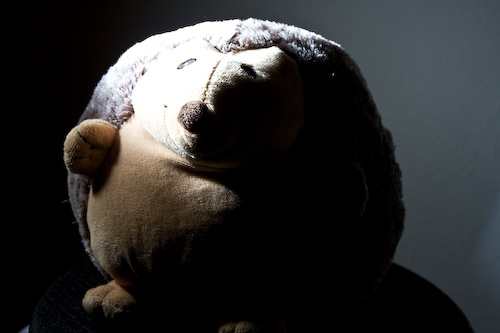
normal snoot, lots of spill
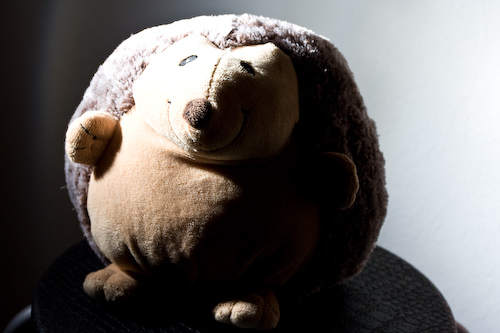
no snoot